Router-Level VPN Protection
Setting up VPN on your router protects all devices on your network automatically - including smart TVs, gaming consoles, and IoT devices that don’t support VPN apps.
Router-Level VPN Protection
Setting up VPN on your router protects all devices on your network automatically - including smart TVs, gaming consoles, and IoT devices that don’t support VPN apps.
This guide works with TP-Link routers that have built-in OpenVPN client support, including:
Before starting, make sure you have:
http://192.168.0.1 or http://tplinkwifi.net)Download Your OpenVPN Configuration File
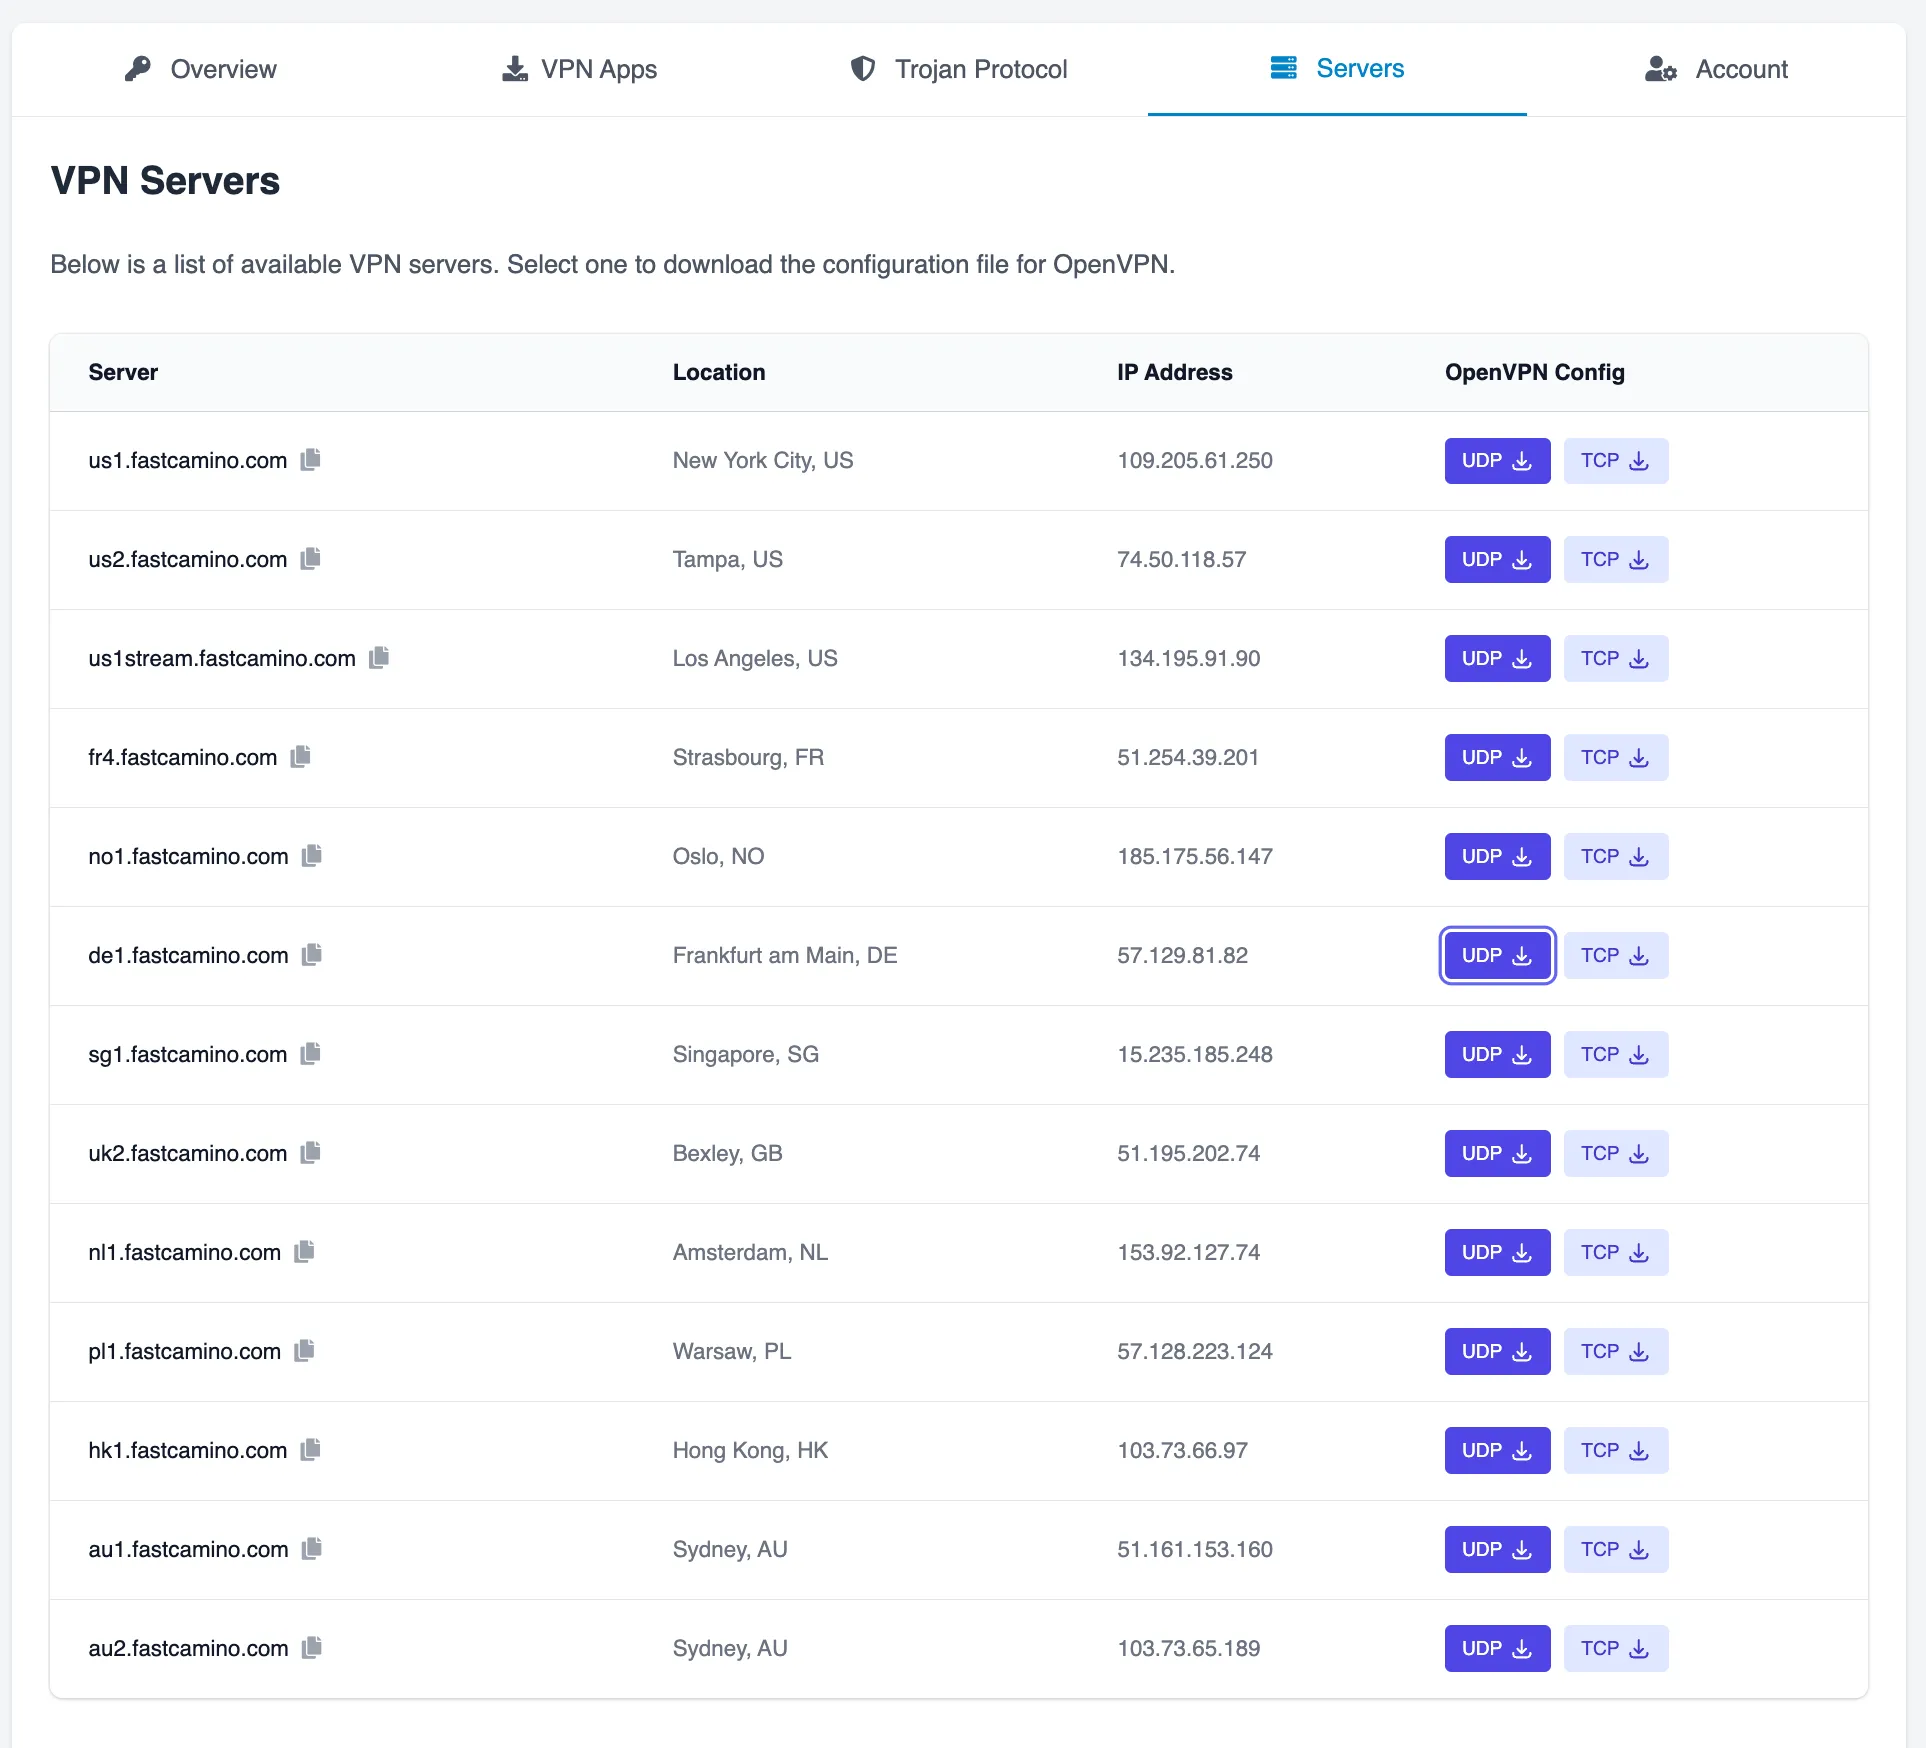
Log in to your VPNBaron Client Area and go to the Servers tab. Find the server you wish to connect to and download its .ovpn configuration file.
Access Your TP-Link Router Panel
Open a web browser and go to your router’s admin page:
http://192.168.0.1 (most common)http://192.168.1.1 (alternative)http://tplinkwifi.netEnter your router admin password to log in.
Navigate to VPN Client Settings
In the router interface:
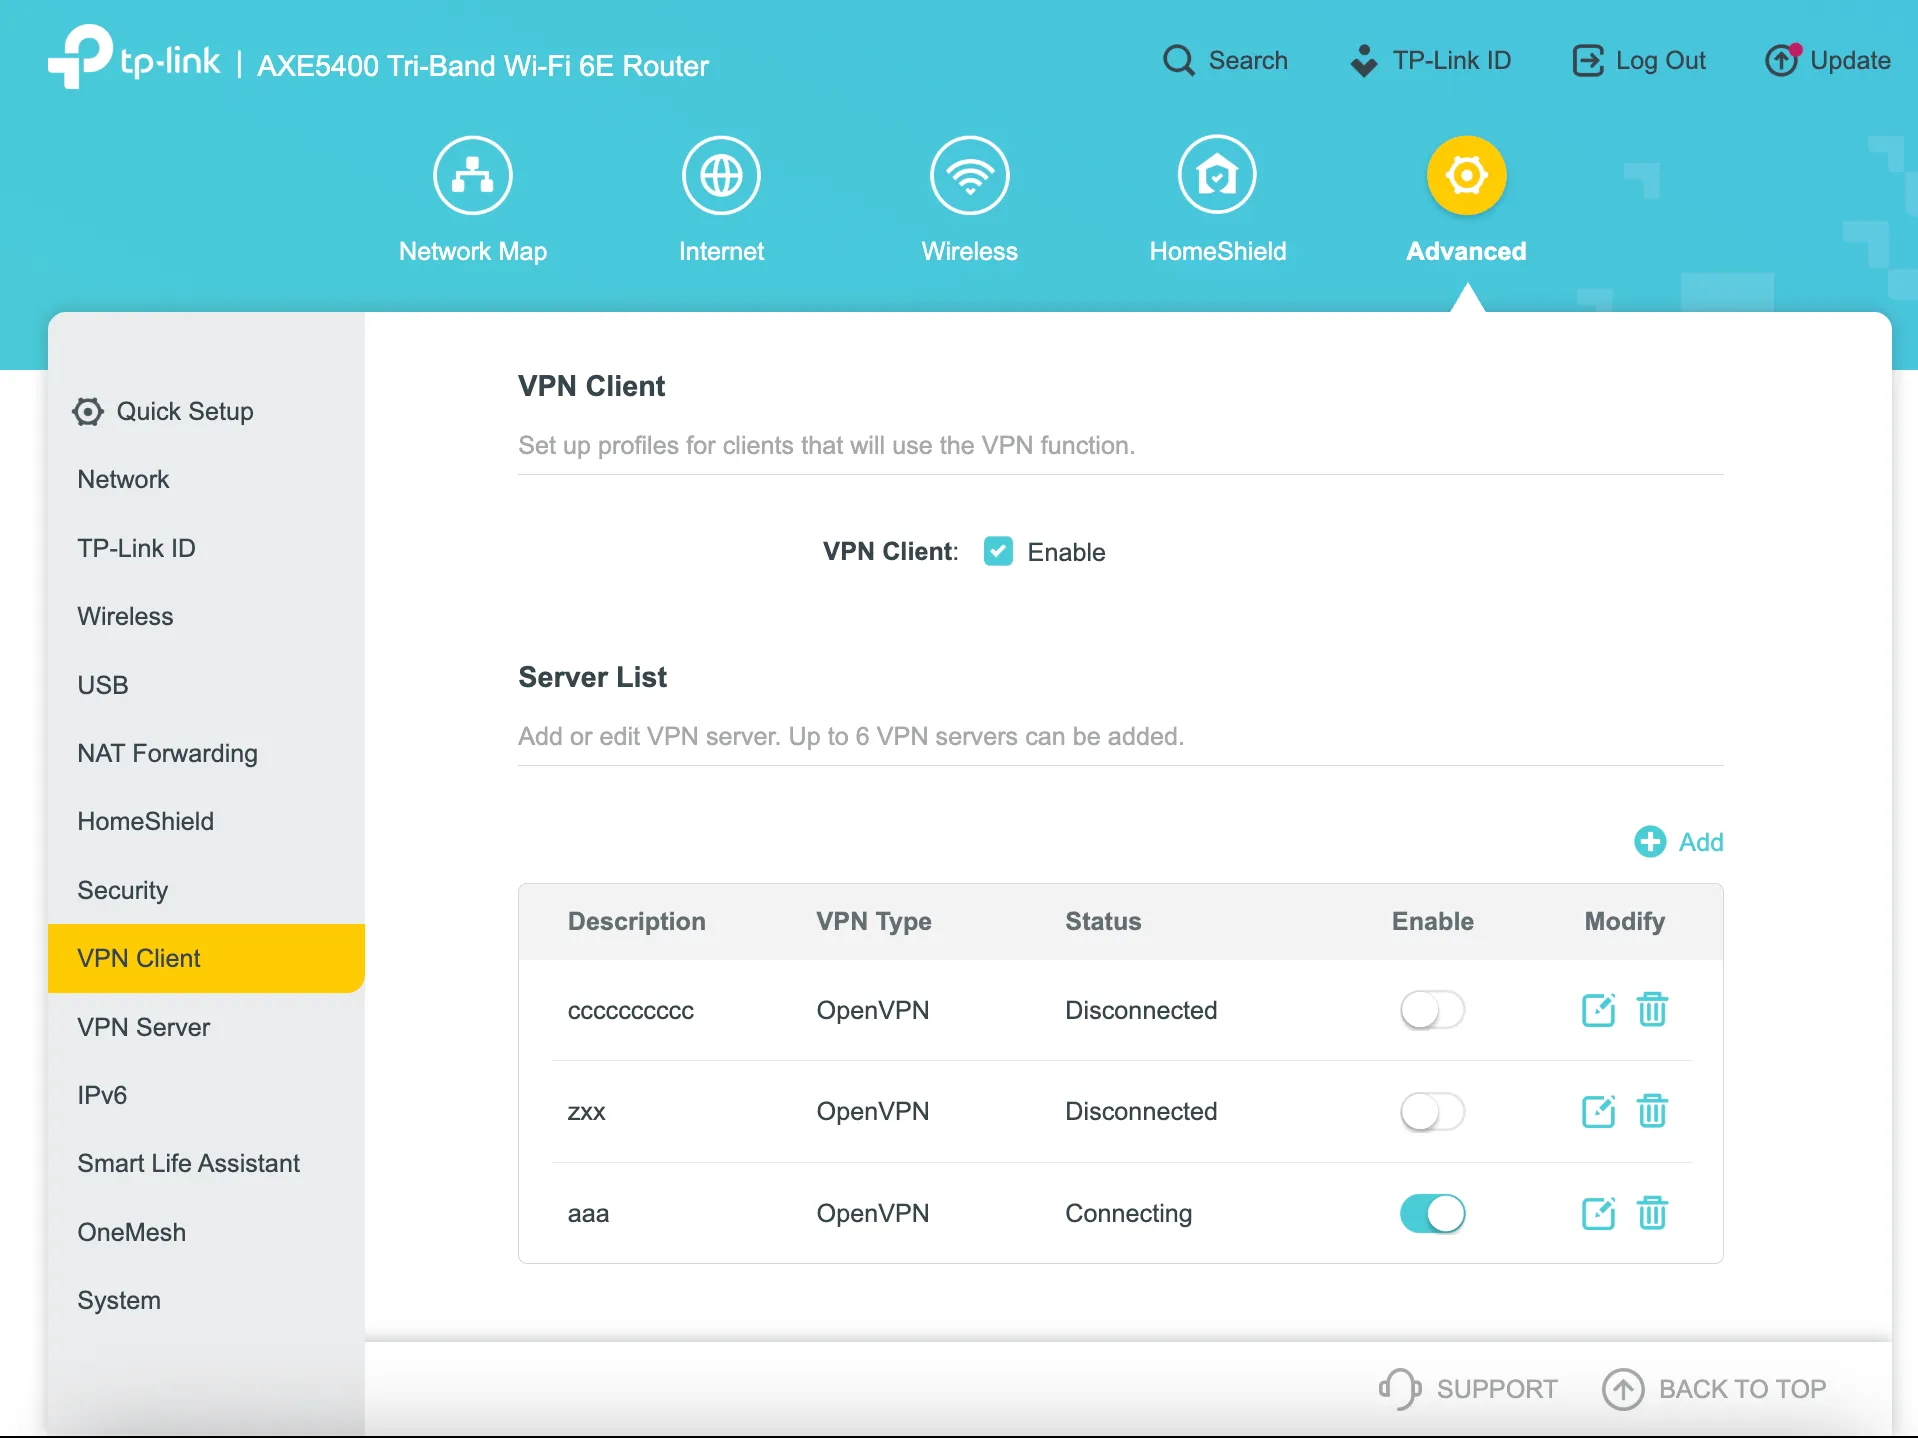
Add a New VPN Server
Click the green ”+ Add” button in the Server List section to add a new VPN configuration.
Configure the OpenVPN Connection
In the “Add Profile” dialog, fill in the following fields:
| Field | Value |
|---|---|
| Description | Enter a name (e.g., “VPNBaron Poland” or “VPNBaron US”) |
| VPN Type | Select OpenVPN |
| Username | Your VPNBaron username |
| Password | Your VPNBaron password |
| Configuration File | Click “Browse” and upload the .ovpn file you downloaded |
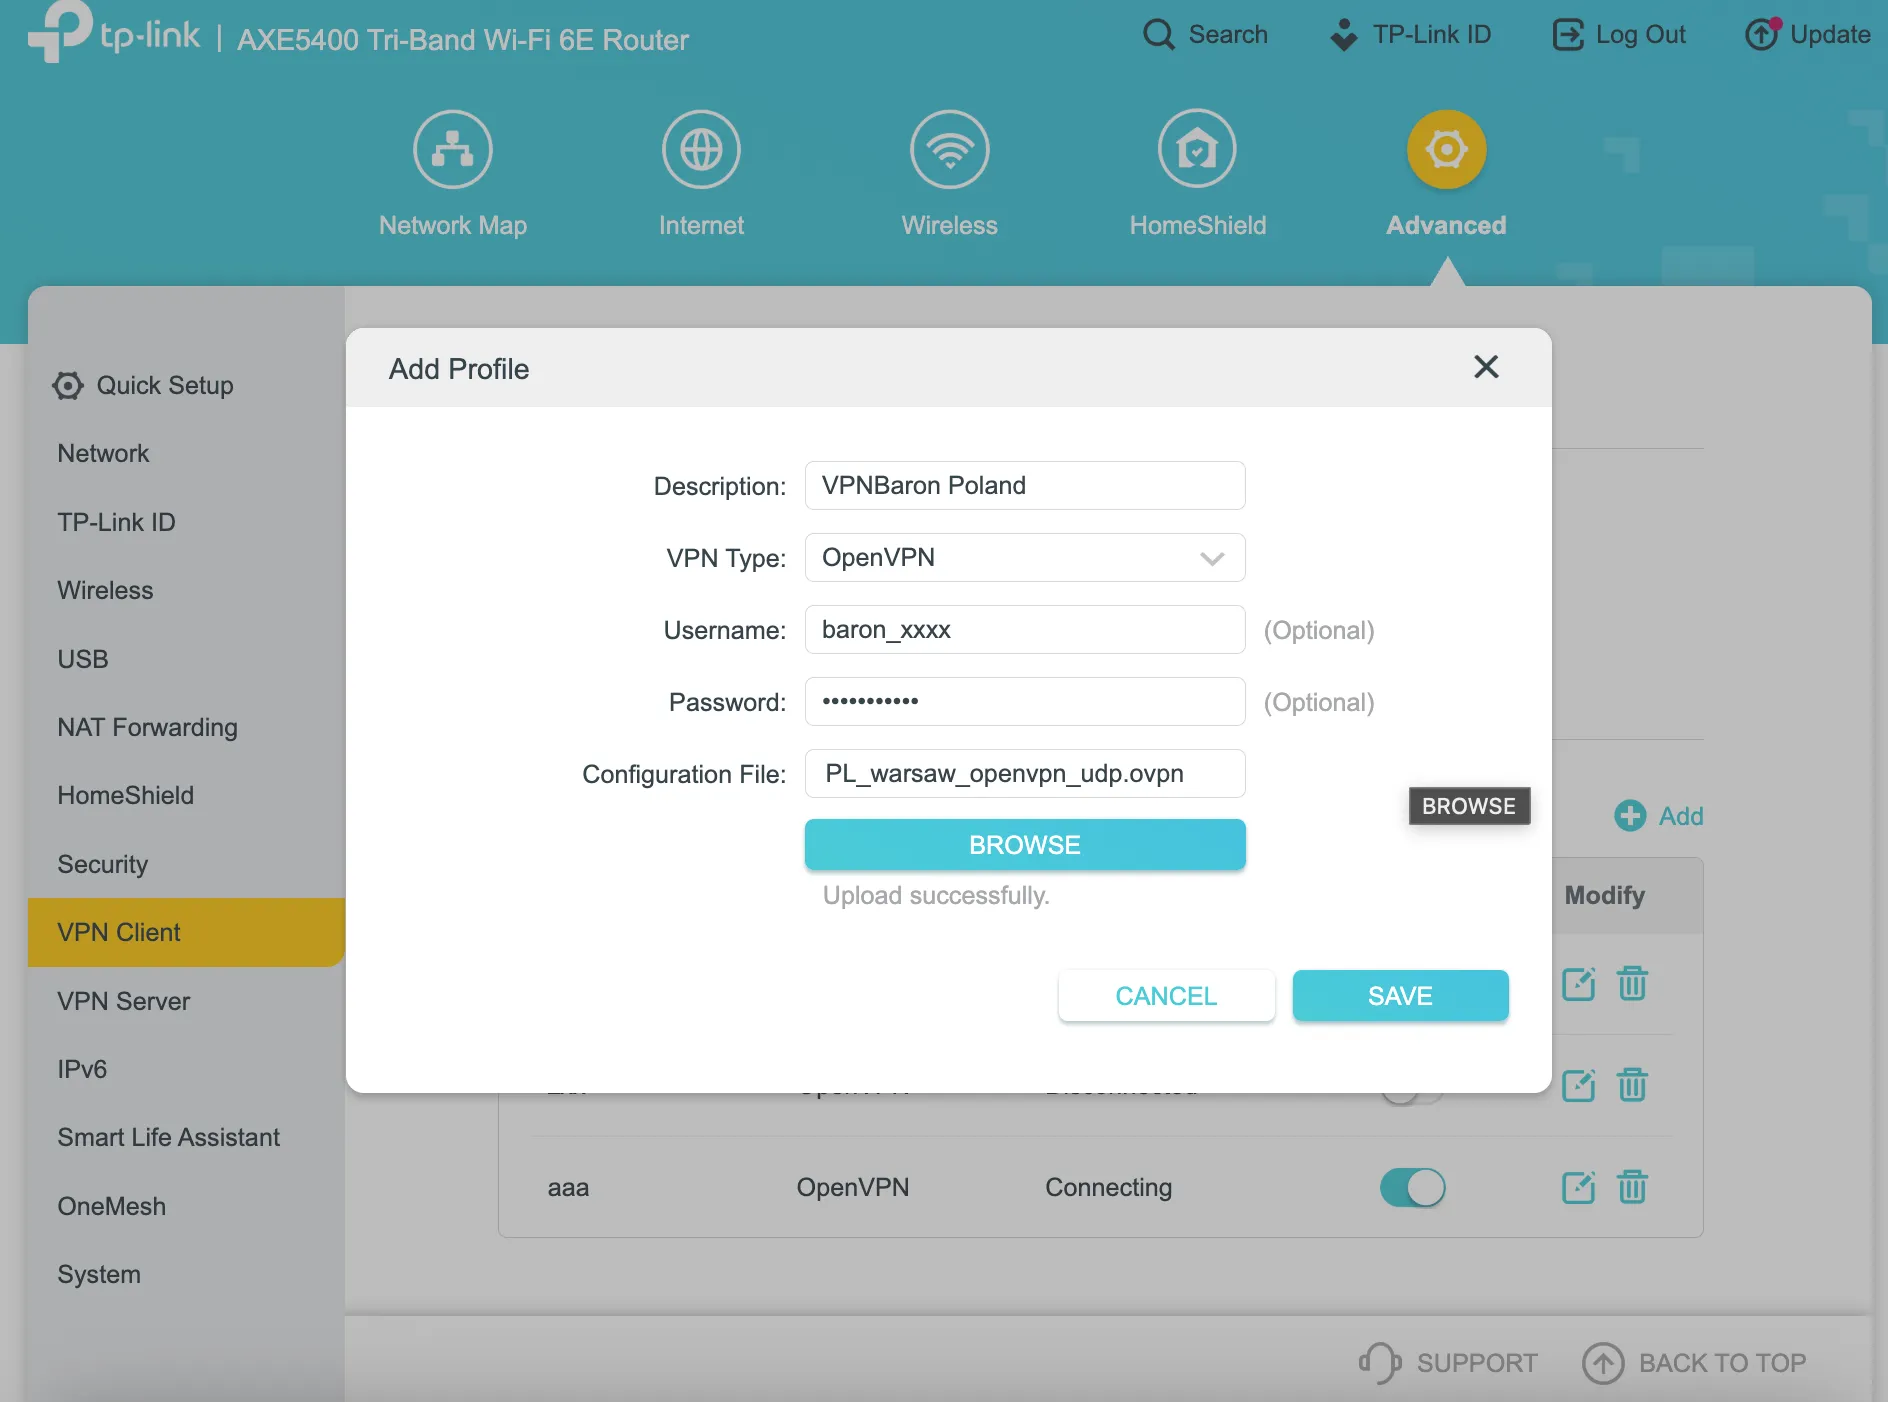
Click “Save” to add the server.
Enable the VPN Connection
Back in the Server List, you’ll see your newly added configuration. Toggle the “Enable” switch to ON (it will turn blue/teal).
The Status column will change from “Disconnected” to “Connecting” and then to “Connected”.
Verify Your Connection
Once connected, verify the VPN is working:
Your TP-Link router can store up to 6 VPN server configurations, but only one can be active at a time.
To switch between servers:
TP-Link routers with VPN client support often include a Device List feature that lets you choose which devices use the VPN:
This is useful if you want some devices (like a work computer) to bypass the VPN.
If you encounter issues not covered here, contact VPNBaron support with: