

IKEv2 on Android Without an App (Built-in VPN)
Android 11 and newer can connect to VPNBaron over IKEv2 on their own, with no app. You add the server once in Settings, then connect with a tap.
The screenshots are from a Google Pixel. On other brands the menus can be named differently; if you can’t find the VPN setting, search Settings for “VPN”.
Before you start
- Android 11 or newer. Android 10 and older don’t have IKEv2 built in; use strongSwan or the VPNBaron app instead.
- Log in at vpnbaron.com and open the IKEv2 page. You need:
- Your VPN username and password, from the card at the top. These are separate from your website login.
- A server address from the list on the same page. This guide uses London (uk1.fastcamino.com) as the example.
1. Open the VPN settings
Open Settings and tap Network & internet.
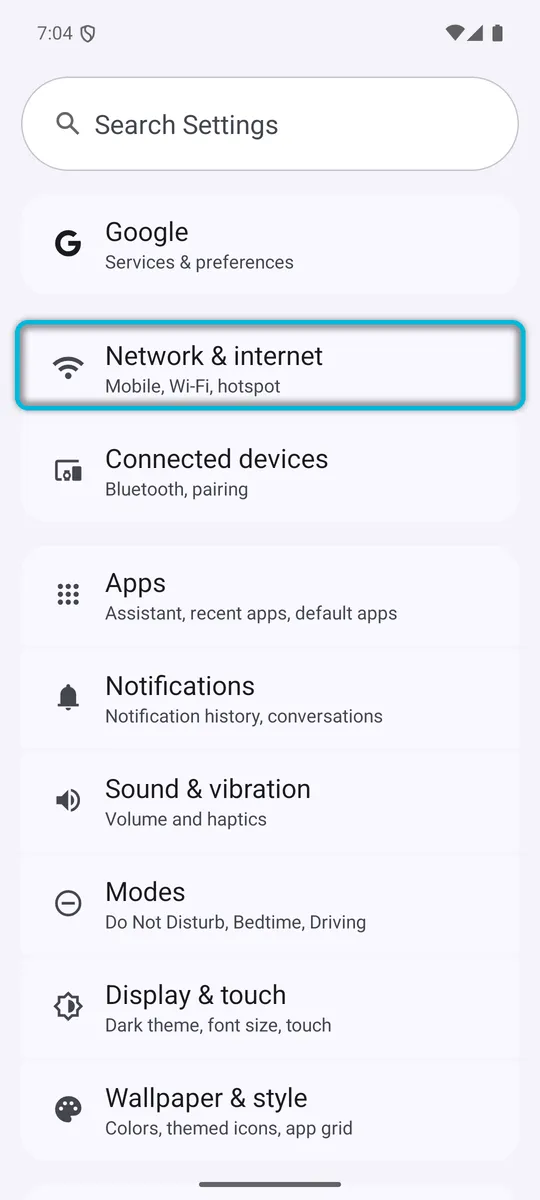
Tap VPN.
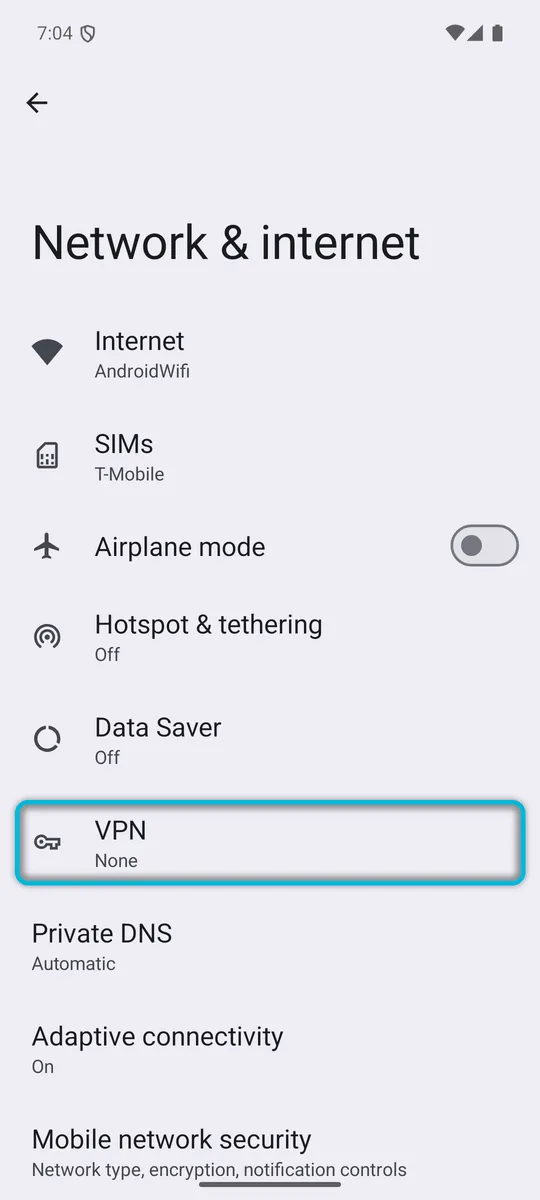
2. Add a VPN profile
Tap + at the top right. Any VPN apps you’ve installed are listed on this screen too; you can ignore them.
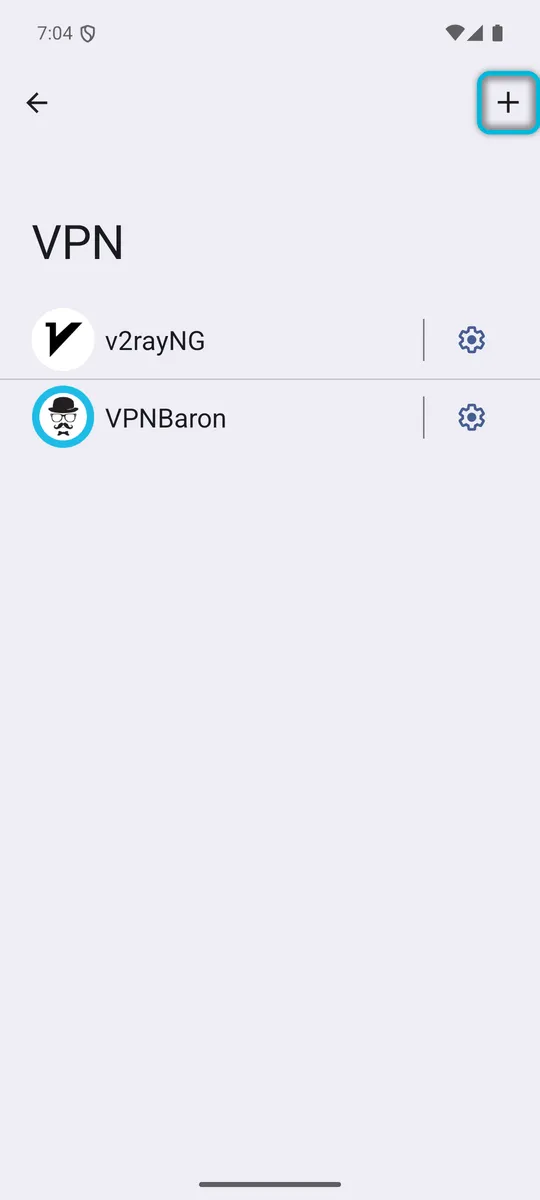
3. Enter the server and your details
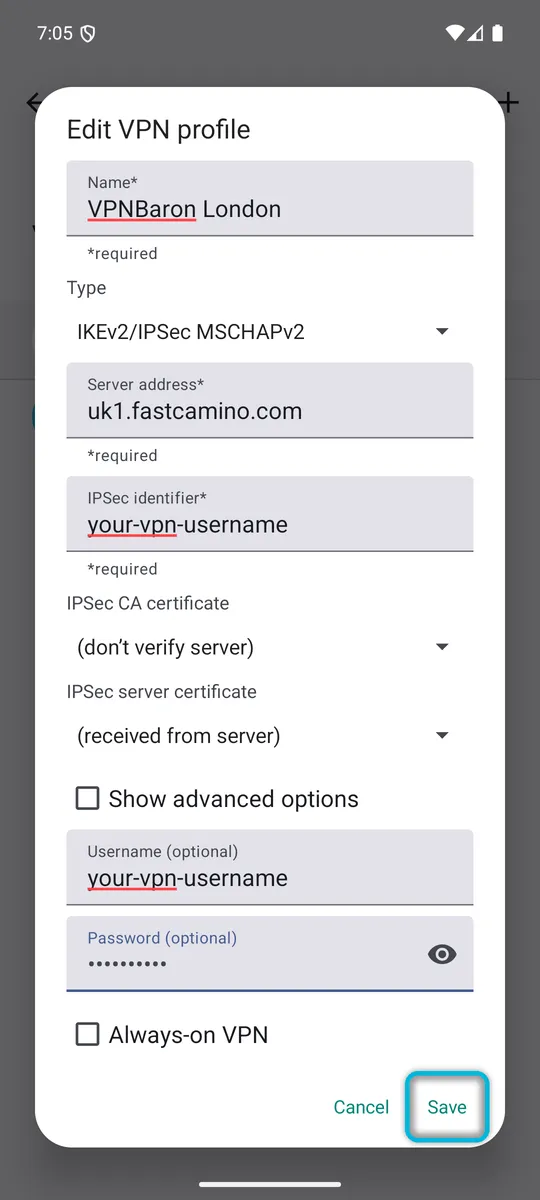
Fill in the form:
- Name: anything you like, for example VPNBaron London.
- Type: IKEv2/IPSec MSCHAPv2. This is usually already selected.
- Server address: the server address from the IKEv2 page, for example uk1.fastcamino.com.
- IPSec identifier: your VPN username.
- IPSec CA certificate and IPSec server certificate: leave them as they are, (don’t verify server) and (received from server).
- Username: your VPN username.
- Password: your VPN password.
Tap Save.
4. Connect
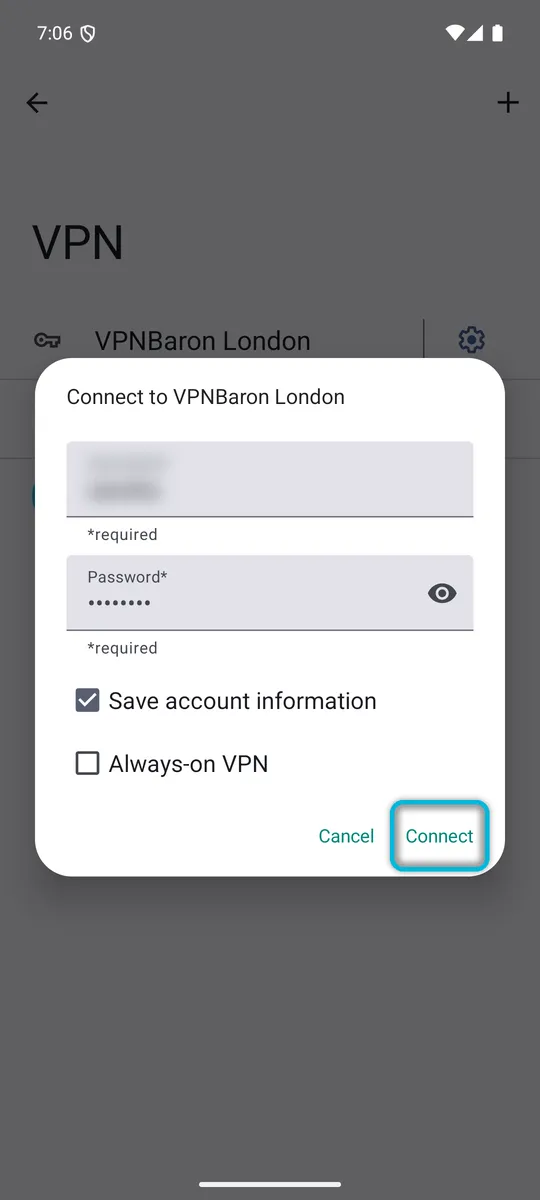
Tap the profile you just saved. Your username and password are already filled in; leave Save account information ticked so you don’t have to enter them again. Tap Connect.
5. You’re connected
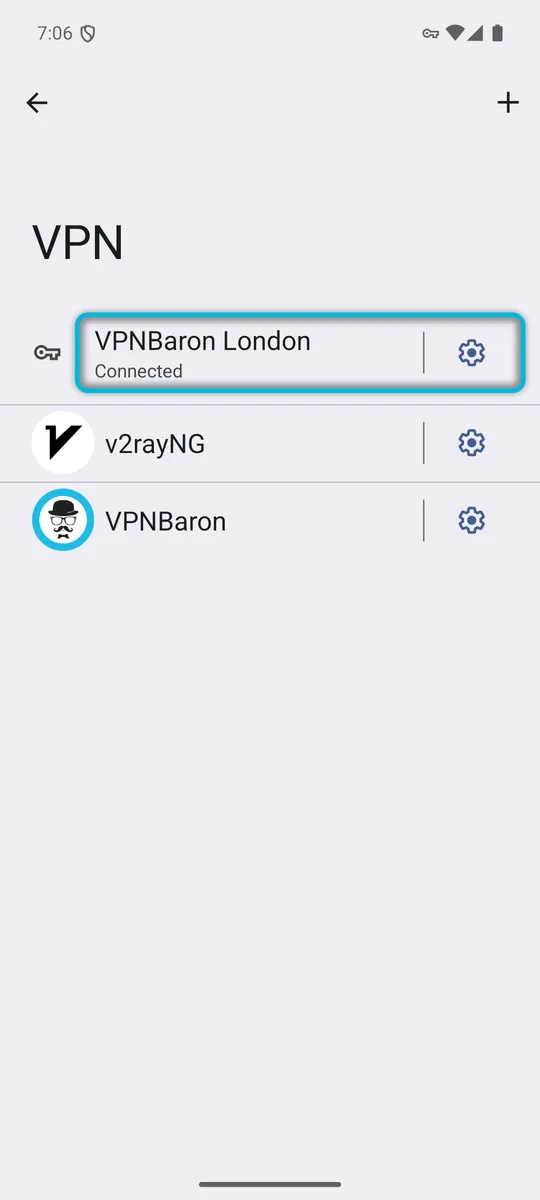
The profile now says Connected, and a key icon appears in the status bar at the top of the screen.
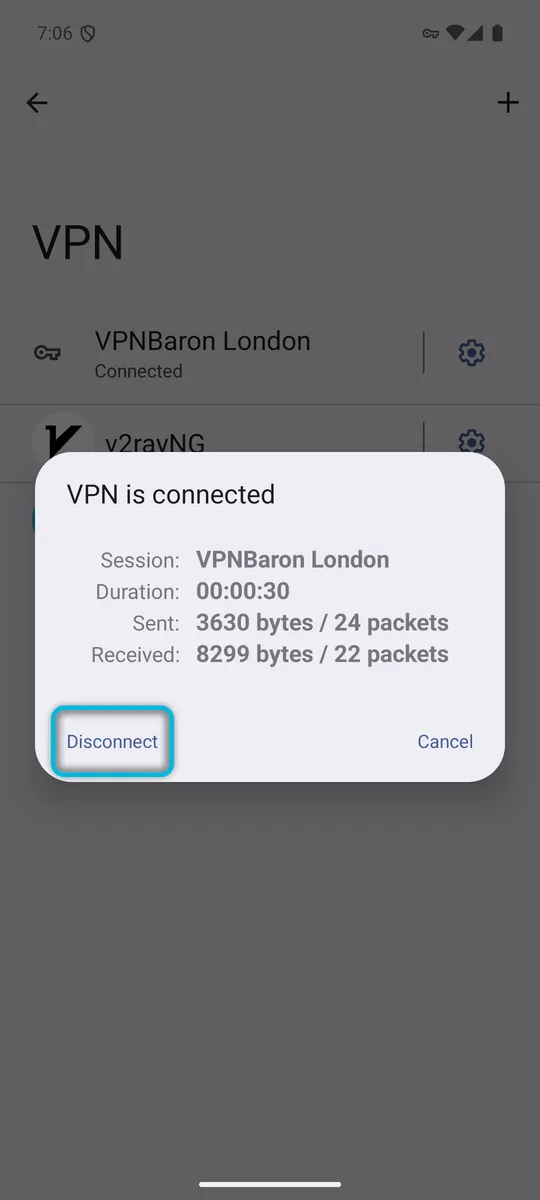
To disconnect, tap the profile again and tap Disconnect. The same window shows how long you’ve been connected.
More locations
Repeat steps 2 to 4 with another server address from the IKEv2 page, and give each profile the location’s name. To have Android keep the VPN on by itself, tick Always-on VPN in the window where you tap Connect.
About “(don’t verify server)”
Despite the name, this doesn’t switch off the security check. For IKEv2 profiles on Android 11 and newer, leaving the CA certificate on (don’t verify server) means Android checks the server’s certificate against the certificates your phone already trusts. VPNBaron’s servers use publicly trusted certificates, so there’s nothing to install.
Troubleshooting
It won’t connect. Check the username and password against the IKEv2 page; they aren’t your website login. Make sure the IPSec identifier is your VPN username, and that the server address is copied exactly. Then try another server.
There’s no IKEv2 type in the list. Your phone runs Android 10 or older. Use strongSwan or the VPNBaron app.
Websites still show your real location. Check that the profile says Connected, and that no other VPN app is connected at the same time.
Still stuck? Open a support ticket with a screenshot of the error and the server you used.